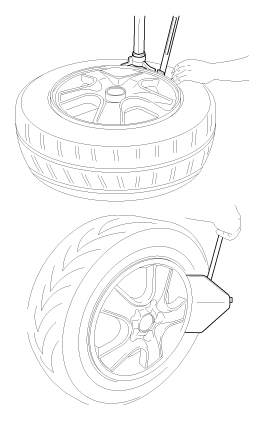
TIRE REMOVAL
| 1. |
Deflate tire & remove balance
weights.
| •
|
The tire bead should be broken
approx. 90° from the valve side of the wheel. The bead
breaker should not be set too
deep. |
| •
|
Avoid tire/tool contact with the
valve on dismount. |
| •
|
Dismount should end near the
valve. |
| |
SENSOR REMOVAL
|
Handle the sensor with
care. |
| 1. |
Remove the valve nut.
|
The valve nut should not be
re-used. | |
| 2. |
Discard the valve
assembly. |
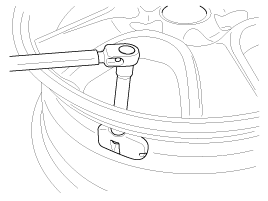
SENSOR FIT
| •
|
Handle the sensor with
care. |
| •
|
Avoid lubricant contact if
possible. | |
| 1. |
Assemble valve to sensor and turn valve 3
times with the square part of the screw in the slot.
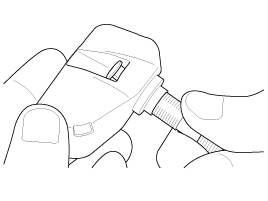
| •
|
The fit should not be tight i.e.
it should still be possible to easily adjust valve
angle. |
| •
|
Ensure that the wheel to be fitted
is designed for sensor mount. There should normally be a
mark to indicate this. |
| •
|
Ensure that the valve hole and
mating face of the wheel are
clean. | | |
| 2. |
Mount assembly to wheel.
|
Ensure sensor feet are against the wheel
throughout the remainder of the assembly
process. | |
| 3. |
Tighten washer and nut by hand until the valve
thread meets the nut built-in calibrated stop.
|
Ensure that the grommet remains in
contact with the wheel. |
|
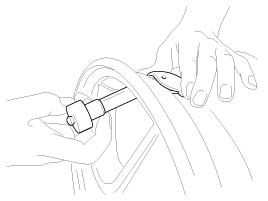
| 4. |
Using a torque wrench, tighten the nut to
2.95±0.37 lb-ft (4.0±0.5 Nm) It is normal to feel a break as the 1.7
lb-ft (2.3Nm) calibrated stop in the nut snaps and the torque
falls.
| •
|
Increase torque smoothly in order
to achieve a clean break of the
stop. |
| •
|
Do not exceed allowed
torque. |
| •
|
Do not use electric or pneumatic
tools. | | |
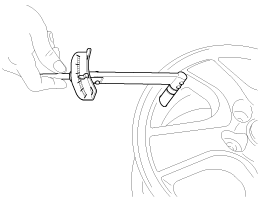
TIRE FIT
|
Only use wheels designed to accommodate the
TPMS sensor. |
| 1. |
Lubricate the tire bead not the rim. Excessive
lubrication should not be applied. |
| 2. |
Start tire mounting approx. 5.9 in(15 cm) from
valve. |
| 3. |
Move the mounting tool away from the
valve.
|
Avoid tire / tool contact with the
valve. | |
| 4. |
Finish with mounting tool near to
valve. |
| 5. |
Perform inflation / pressure correction and
then fit valve cap. |
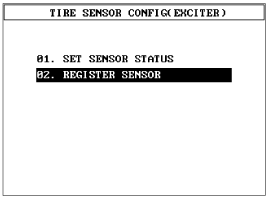
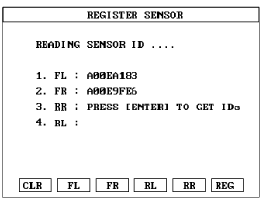
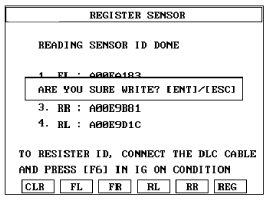
SENSOR INITIATING PROCEDURE
| 1. |
Read the four sensor's ids starting with
sensor 1 (1 normally front left, 2 front right, 3 rear left, 4 rear
right).
|
| 2. |
Connect 'TPMS exciter' to the diagnostic
connector.

|
| 3. |
Register the four sensor's ids to the
receiver.
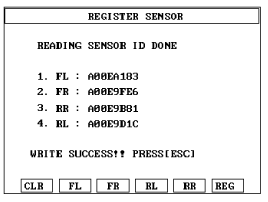
|
| 4. |
Disconnect diagnostic
link. |
| 5. |
Cycle Ignition, wait 1 minutes and check that
Normal Receiver State is now
indicated. |